|
Icetips Utilities Documentation
5/15/2016 Utility Template: Create a New Window Procedure |
|
Previous Top Next |
This wizard template creates a new window procedure. Due to problems with the #IMPORT template statement in Clarion, we have had to resolve to letting the wizard create a TXA file that you have to import manually. Using the #IMPORT template statement could result in frequent crashes of the Clarion IDE when using the wizard template.
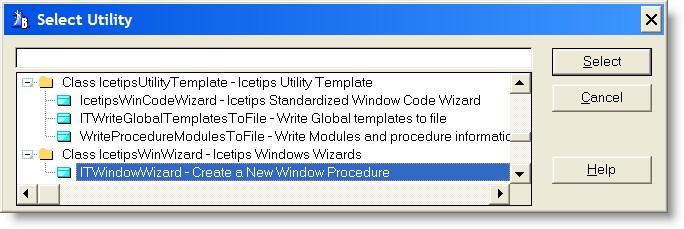
To start the wizard, either press Ctrl-U on the keyboard or select "Application | Template Utility..." from the Clarion IDE main menu. That will bring up the "Select Utility" window. Locate the "IcetipsWinWizard - Icetips Windows Wizard" class and then "ITWindowWizard - Create a New Window Procedure" - see the screenshot below.
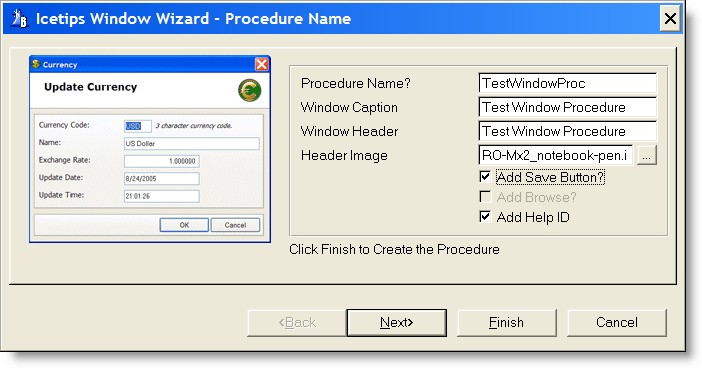
The first screen prompts for procedure name and also the window caption and header text. When the caption is entered it is automatically copied to the Window Header. You can choose to create a plain window, a window with a save button (form) or a window with a browse.
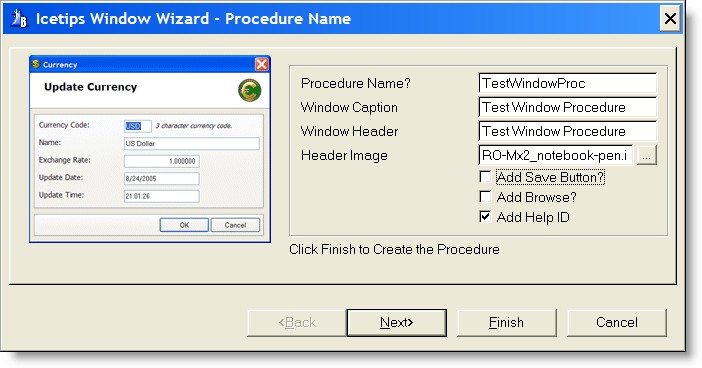
For a plain window, leave the "Add Save Button?" and "Add Browse?" checks unchecked. "Add Help ID" will add the procedure name as a help id for the window, i.e. it adds HELP('TestWindowProc') if that is the procedure name you entered. "Add Help ID" is checked by default.
For a form window, check the "Add Save Button?" When you do that, the "Add Browse?" check is automatically disabled:
The next window prompts you for what file to use for the update form.
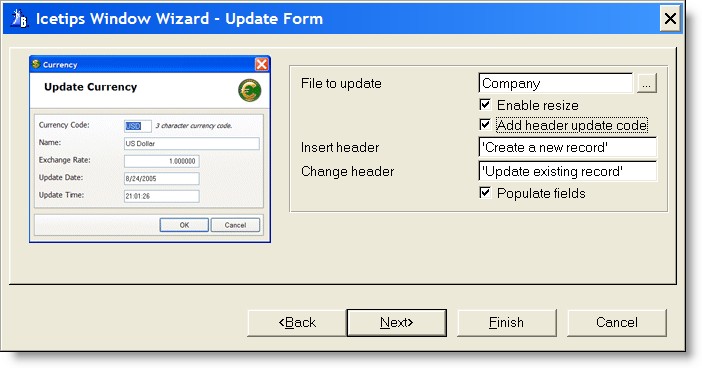
Enable Resize is not checked by default. If it is added resize template is added to the window. Note that the wizard does not attempt to set up the resizing, just adds the template to the window.
Add header update code is not checked by default. It adds code to show the strings in the "Insert Header" and "Change Header" in the header panel when inserting or changing record.
Populate fields enables the next window in the wizard where you can select fields to populate on the form. Note that no tabs are created on the window. The form will extend down to contain upto a maximum of 10 fields. Currently this maximum is fixed in the template code, but we will make it adjustable in future releases.
The next window allows you to pick what fields to add to the form window.
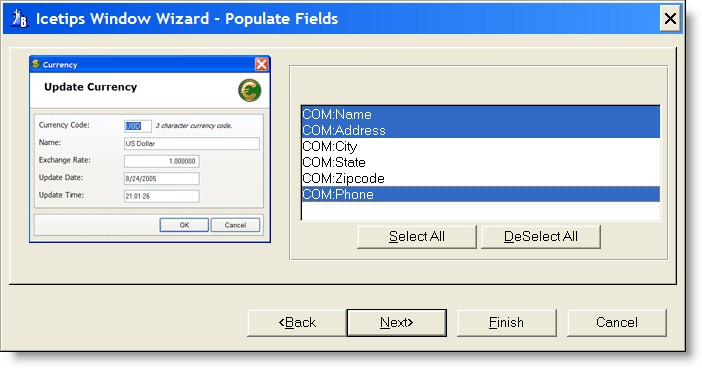
Simply click on the fields you want to add. You can also use the "Select All" and "DeSelect All" buttons to do just that - select all the fields or deselect them all.
If you opted to create a browse instead of a form, you will get a slightly different sequence after the first window.
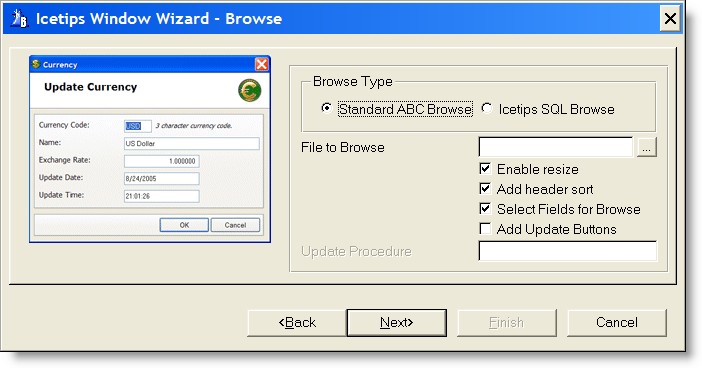
The first option is to select between a standard ABC browse or the Icetips SQL browse. The only difference is that when the Icetips SQL browse is selected, the "Add header sort" is disabled since the Icetips SQL browse always uses header sort.
You are prompted to choose the file to use in the browse. Note that only a single file is selected and parent/child files cannot added to the browse at this point.
Enable resize is checked by default and adds the resize template to the window. Again, same as with the forms, this only means that the resize template is added and no code is generated to attempt to set resize options for individual controls.
Add header sort (ABC browses only) adds the header sort option to the browse. This option is not enabled for the Icetips SQL since it always uses header sorting.
You can optionally select what fields to choose for the browse, this is done in the next screen. If you want to add the fields later, just uncheck this option.
Add Update Buttons is not checked by default. You can add the update buttons and then optionally specify the update procedure. Note that adding the update buttons does not automatically create a form - this wizard only creates one procedure at a time.
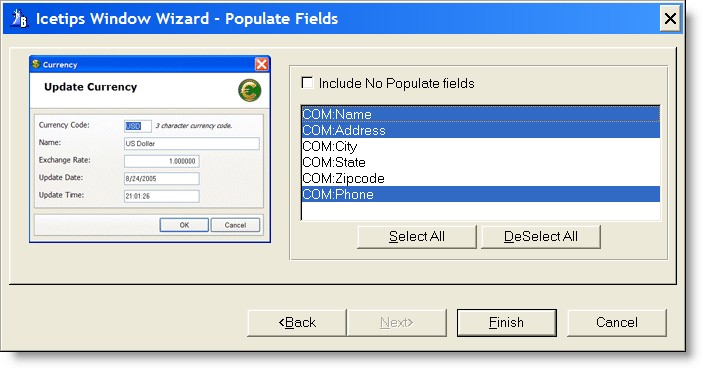
On this window you can select what fields to add to the browse. The "Include No Popluate fields" checkbox is cleared by default. When checked it will refresh the field list to show any fields that have the "No Populate" option checked in the dictionary. In some cases you may want to show those fields on browses.
When you click the "Finish" button you will be faced with an error window!
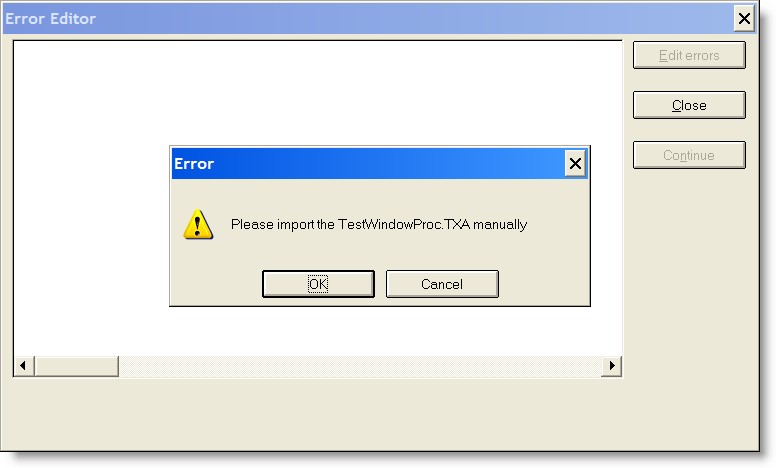
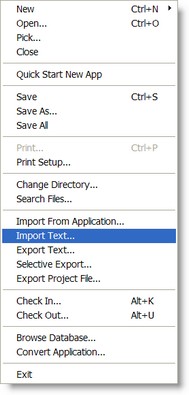
This tells you all that you need to do. The wizard created a TXA file in the application folder with the name that you entered for the procedure. Because of the problem with the #IMPORT statement as described above, you need to manually import the TXA. To do that, select "File | Import Text..." from the Clarion IDE main menu.
|
|
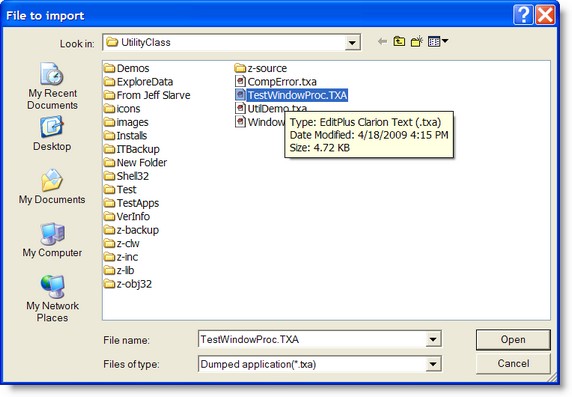
Then pick the file from the "File to Import" dialog and the Clarion IDE will import it to the application. Note that if you created a browse window and added the update buttons you will get a ToDo procedure for the update form. Double click on it and run this wizard again to create the form.